
Moving pallet racking
- Once the final safety check is complete, begin moving the fixture slowly and steadily toward the designated destination.
- This area should be clearly marked, blue masking tape is typically used to show the end destination.
- Follow the approved move route and stay attentive to any verbal instructions or callouts from team members.
- Throughout the move, remain alert for environmental hazards such as unsecured merchandise, obstacles, or overhead obstructions. If you notice any unsafe conditions, report them immediately to your supervisor or team lead. Consistent, two-way communication with your team is essential to ensure a safe, smooth, and coordinated mobilization.
Example move routes
The following are three example move routes you may encounter, but the range of directional maneuvers is more extensive as shown in the Fundamentals for Operators course. The move route will vary according to the job site plan and store layout. Always ask your supervisor for directions.
Example 1
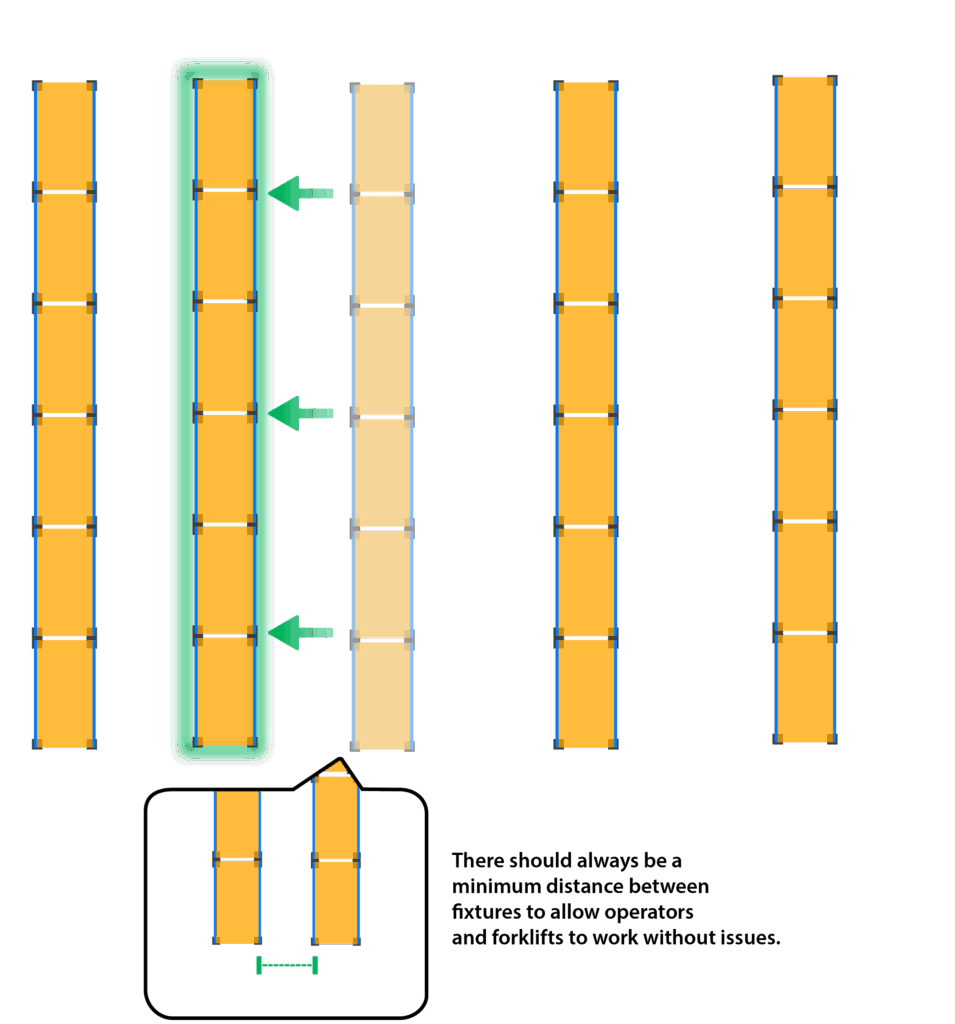
This example scenario is when a fixture is moved slightly to one side. This move is common during floor polishing, remodeling, or other instances that would require you to adjust the width of an isle.
During this process, make sure to maintain enough distance between fixtures to allow operators to move in between them safely.
Example 2
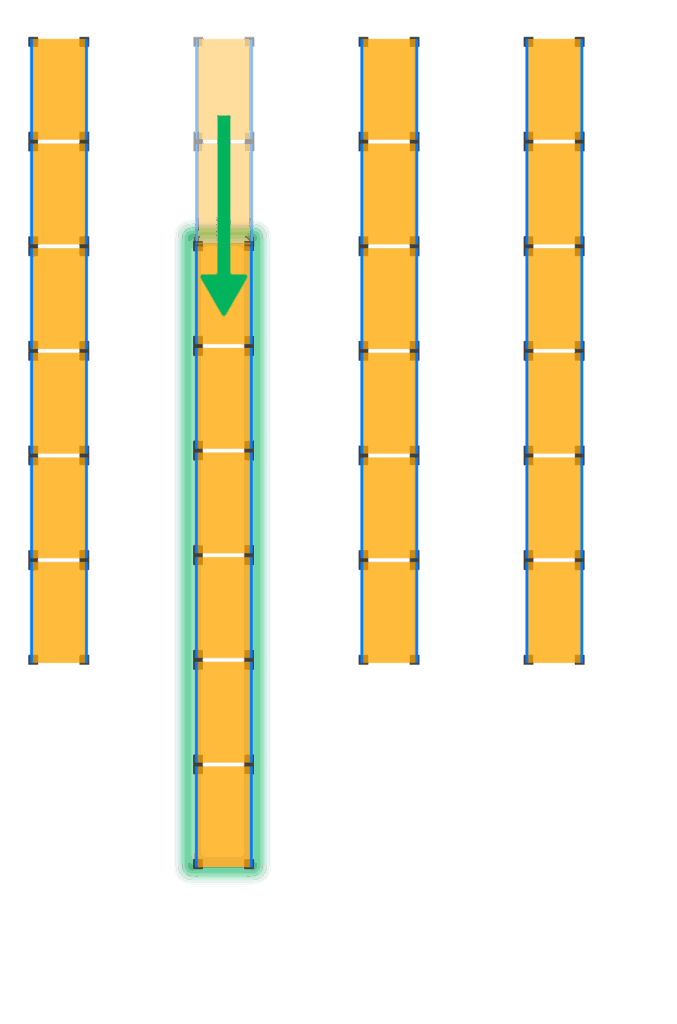
The following image shows an example scenario where a fixture is pushed slightly downward and out of alignment with the other fixtures. This move is common when clearing the fixture from the move route to perform a more complex move.
Example 3
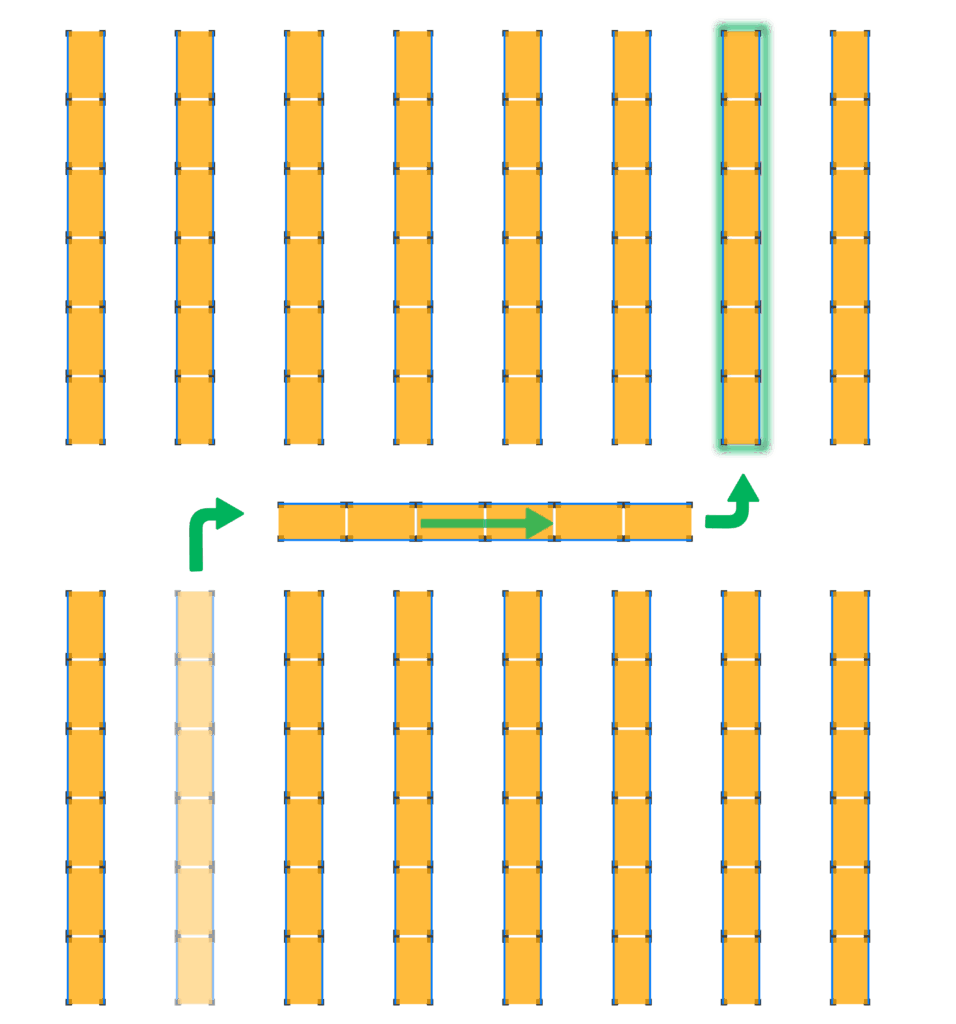
This example scenario shows the fixture being relocated across the job site. This move could occur for a variety of reasons, from remodel projects, to installing seasonal retail displays.
The fixture is rotated and pivoted multiple times. At the destination area, the fixture is in the same orientation as it was at the beginning of the move.
Arriving at the destination
- Keep the fixture in motion and come to a slow, controlled stop at the destination marked by your supervisor. If you stop short or overshoot the target, restarting movement can be difficult.
- Once positioned over the target location, carefully lower the fixture using the lift mechanism. Lower both sides evenly to maintain balance and control.
- When the fixture is fully lowered and stable on the ground, detach and remove the PRM system.

After the fixture is secure, stop and inspect for any out of place merchandise and return it to its correct location.
Reattach any removed fixture components (e.g. pallet rack end caps or signage), then check with your supervisor for any additional setup steps before repositioning skates for the next fixture.
Move the next fixture
When additional pallet racks require relocation, the skates can be easily transported using the instructions below.
- Make sure the path to the next fixture is clear.
- Transport the skates to the next fixture and repeat the installation process.
As a team you want to keep the momentum and stay busy. While a fixture is in motion others can be cleaning the area where the pallet rack previously was housed.